
Integrating WhatsApp with Odoo allows you to centralize all customer communications directly from your ERP — automating messages, notifications, and responses.
Odoo’s official documentation explains almost every step of the process… except one crucial detail: how to make your phone number status in Meta Business Suite change from “Pending” to “Connected.”
In this article, we’ll walk you through the additional steps needed to successfully complete the setup and get your WhatsApp account fully connected to Odoo.
How to set it up?
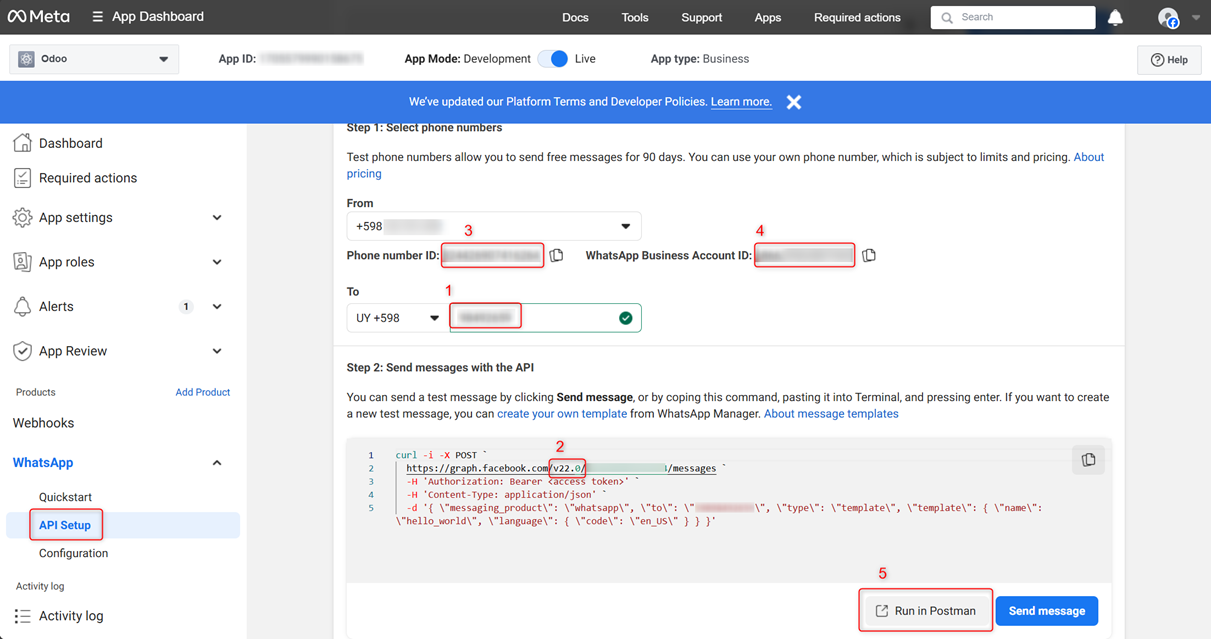
Step 1: Get the Required Information from Meta for Developers
Go to Meta for Developers and open the application you created for Odoo.
Then, under API Setup, follow these steps:
- Enter a valid phone number in the “To” field. (If the number is not valid, the “Run in Postman” button will remain disabled).
- Save the API version value (e.g. v22.0).
- Copy the Phone Number ID.
- Copy the WhatsApp Business Account ID (WABA ID).
- Click “Run in Postman.”
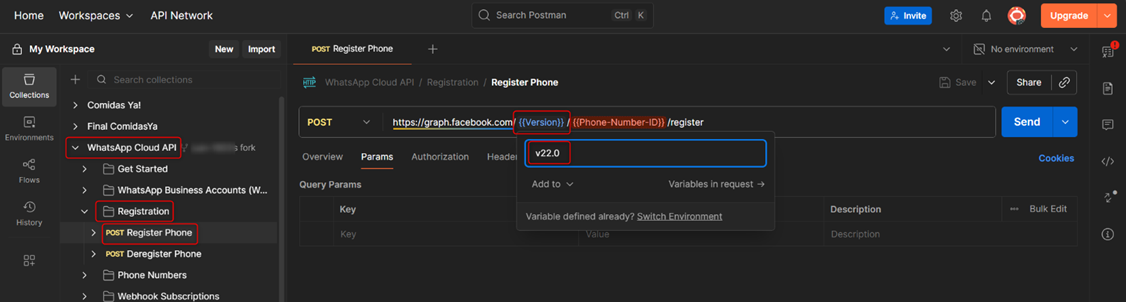
Step 2: Register Your Phone Number in Postman
After clicking “Run in Postman”, you’ll be redirected to Postman’s web app.

Sign in (or create an account if you don’t have one). Then:
- Click “Fork collection”
to copy it to your workspace.

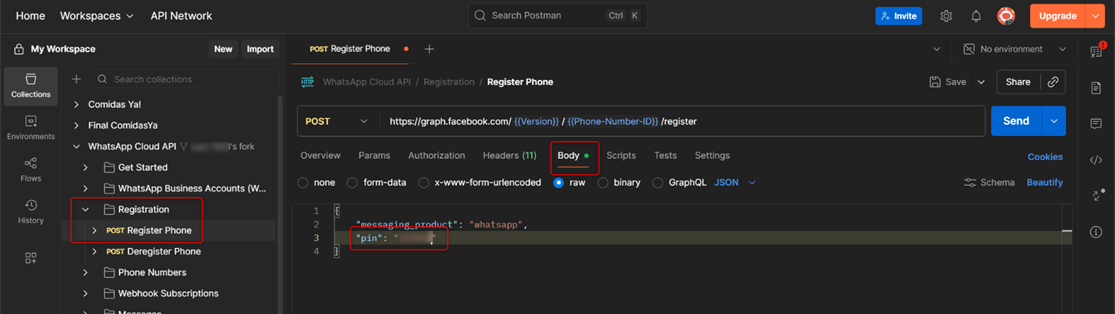
- In the left panel, navigate to:
WhatsApp Cloud API > Registration > POST Register Phone. - Hover over {{Version}} and
enter the version value you saved in Step 1. Press Enter.
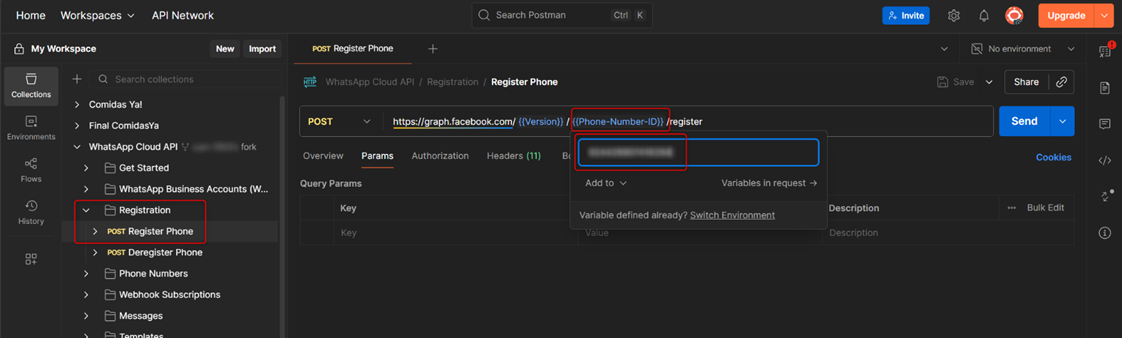
- Do
the same with {{Phone-Number-ID}}, pasting your phone number ID.
- In
the Body tab, change the “pin” value to your own (minimum 6
digits).
- In the Authorization tab, configure:
- Auth Type: Meta API
- Auth credentials: your permanent token generated
in Meta Business Suite (following the official Odoo documentation).
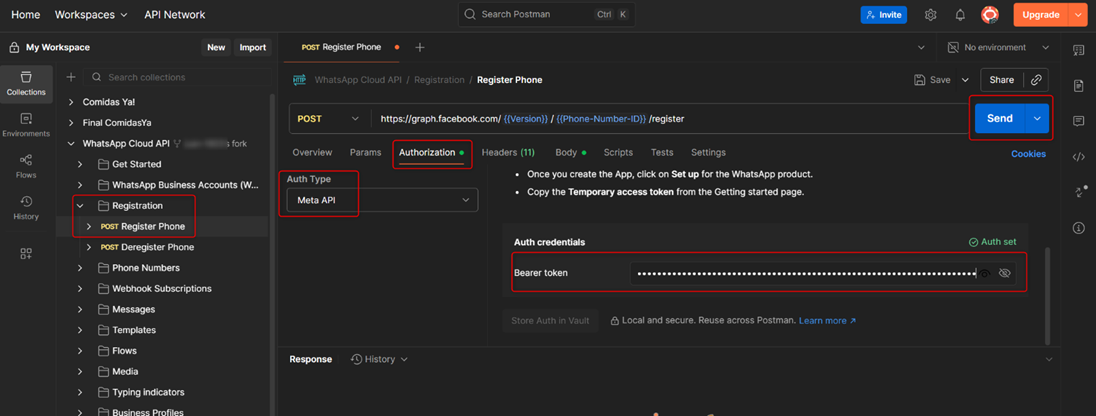
- Finally, click Send. If
everything is correct, you’ll see:

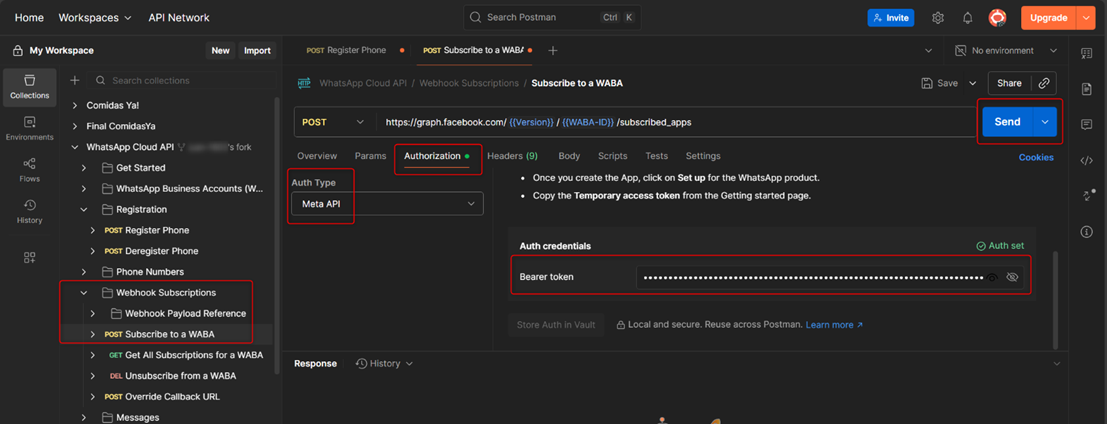
Step 3: Subscribe Your WhatsApp Business Account
Repeat a similar process as above:
- In the left panel, navigate to:
WhatsApp Cloud API > Webhooks Subscriptions > POST Subscribe to a WABA. - Hover
over {{Version}} and enter the version from Step 1.
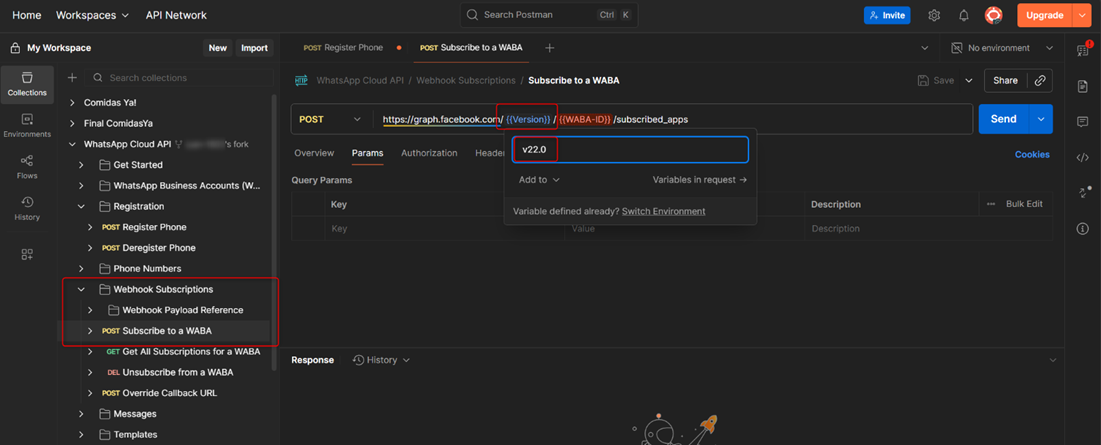
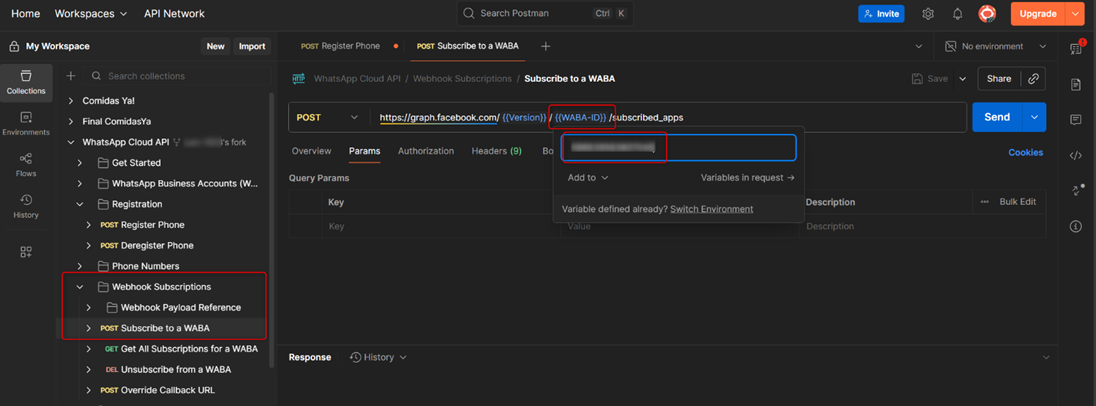
- For {{WABA-ID}},
paste your WhatsApp Business Account ID.
- In the Authorization tab, configure:
- Auth Type: Meta API
- Auth credentials: the same permanent token.
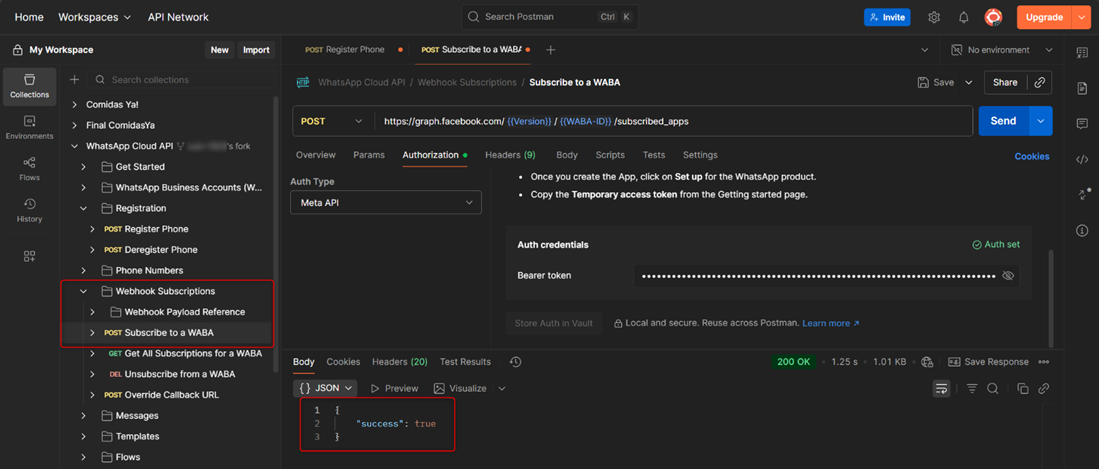
- Click Send. If you
receive "success": true, your number is now connected and Odoo
can start communicating with your customers through WhatsApp.
Conclusion
With these extra steps, your WhatsApp number will change from “Pending” to “Connected”, and the integration with Odoo will be fully functional.
While Odoo’s official documentation covers most of the process, this final part is what truly makes the connection work and enables your ERP to send and receive WhatsApp messages seamlessly.
At Altos Global, we help businesses implement and optimize Odoo so every feature works exactly as it should.
If you’re looking to connect WhatsApp with Odoo or streamline your communication and sales processes, get in touch with us, our team can help you set everything up quickly, securely, and hassle-free.